| FILTER DATA ACCESS |
Principle
This area displays the following information:
The following paragraphs detail the available functions :
| Filtering access to data |
Principle
Options and Rights
Several options and rights allow applying some restrictions on a list of drawings that can be displayed in Engineering Drawing.
- Firstly, you can only access a drawing matching the list of aircrafts you operate or own or maintain (generally your fleet).
- You can select a program to limit the access to some documents (sheets, Parts List, Parts Usage).
- You can select a MSN number in a Program to restrict information output (Parts Usage).
- You will have a specific right to view some documents. For example the "Detail Drawings" or "Unreferenced drawing" have a restricted access. In regard to your contract, you can have or not have access to this drawing sub-set.
These criteria allow you to focus on the specific information concerning just a program or aircraft in your fleet.
Access to Drawing Information
When you select a program, the Parts Usage describes all the Airbus aircrafts where the concerned part number is used and could be limited to an aircraft in your fleet, by selecting an MSN number (where the concerned part number is used).
| To View a Drawing Picture |
Principle
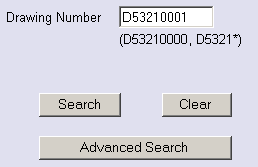
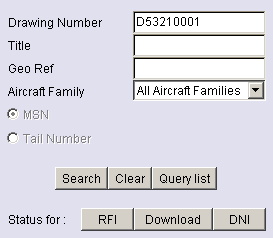
To view a drawing, you have to enter the drawing number into the reference field of the main option of the query area.
The "Search" button launches the query and then displays the drawing pictures.
 |
 |
|
Main query Area example
|
Advanced query Area example
|
When you ask for Drawing Pictures in the query area you can view all their sheets.A drawing sheet may be composed of several frames.
Note: several viewers are available and validated by Airbus to display Drawing Pictures.
Scope
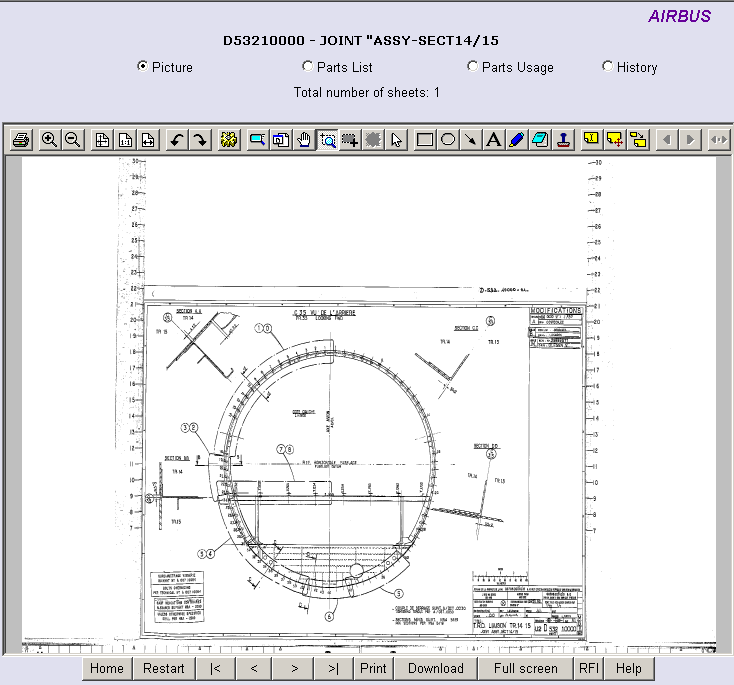
The following elements are displayed:
The contextual area is updated according to the current drawing.
- The drawing number and the drawing title
- 4 options: Each option allows to switch and to access the selected document in the current Drawing Set.
- Pictures: Access to pictures
- Parts List: Access to the Parts List report
- Parts Usage: Access to the Parts Usage report
- History: Access to the Drawing Set History (available for authorized users)
- The total number of sheets composing the current Drawing Set
Display Area:
The viewer options allows to perform actions on the displayed picture: zoom in, zoom out, to view the full image, to print it or to display the next frame and so on. Annotations can be added without altering the original Airbus drawing.
This is an example of a drawing sheet displayed in the viewer "TMSSequoia PrizmOCR Plug-in"
Remark: To print a drawing you can also use the specific convenient print option of the button bar that adds a date stamp to the drawing pictures when they are printed (see To Print a Drawing Set chapter for details about this option)
How to display different sheets composing a drawing?
In the button bar, below the current sheet picture on screen, some buttons are displayed:
- |<: When you click on this button the sheet picture 001 is displayed (first sheet)
- >: The following sheet is displayed (002, then 003 and so on)
- <: The previous sheet is displayed (003, 002 and so on)
- >|: The last sheet composing the drawing is displayed
Another possibility to display a sheet picture is to select one sheet in the tree area. The tree area is displayed in the bottom left side of the screen. The current drawing composition in sheets is displayed in it.
Just by clicking on one of these sheets the corresponding picture is displayed. It is possible to select directly any sheet among the drawings already listed in the tree area.
| To view a Parts List |
Principle
You can display those documents by clicking on the corresponding option from the contextual area.
 |
|
Main query area
|
The report displayed contains links to other drawings or reports enabling to navigate in the drawing hierarchy.
On each material specification reference listed in the mechanical Parts List, a hyperlink will launch an interoperability URL request to AirN@v to display the PMS manual.
On each standard part (rivet, grease) referenced in a mechanical Parts List , a hyperlink will launch an interoperability URL request to AirN@v to display the SM manual.
This is an example showing the Parts List for the drawing D53480020.
Remark: a plug-in for adobe acrobat is necessary to view the PDF reports.
Scope
The following elements are displayed:
The contextual area is updated according to the current drawing.
- The drawing number and the drawing title
- 4 options: Each option allows to switch and to access the selected document in the current Drawing Set.
- Pictures: Access to pictures
- Parts List: Access to the Parts List report
- Parts Usage: Access to the Parts Usage report
- History: Access to the Drawing Set History (available for authorized users)
- The total number of sheets composed the current Drawing Set
| To view a Parts Usage |
Principle
You can display those documents by clicking on the corresponding option from the contextual area.
 |
|
Main query area
|
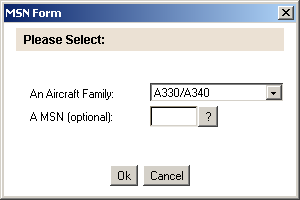
To activate this option, an aircraft family and a MSN (optional) should be selected by using the "Advanced Search" option or by selecting them in the previously prompted window.
The Parts Usage report contains links to other drawings or reports enabling to navigate in the drawing hierarchy.
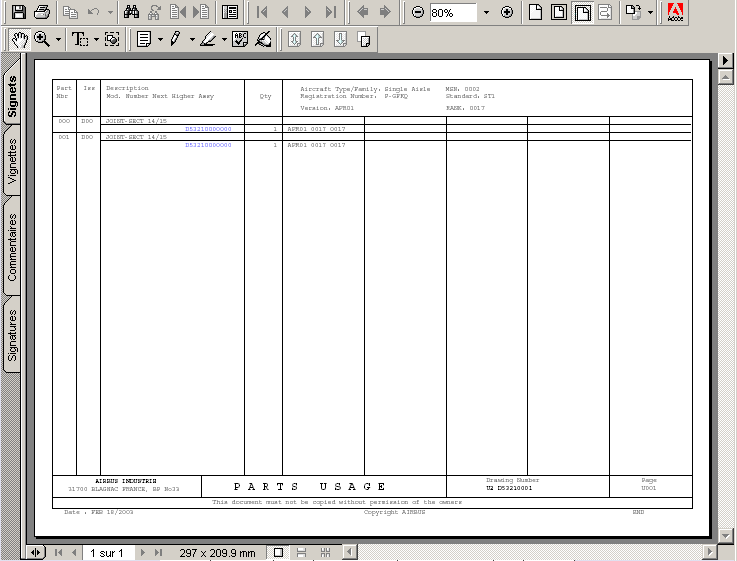
The viewer options allow to perform actions on the displayed report: zoom in, zoom out, display of the next page, to print the document and so on. Annotations can be added without altering the original Airbus document.
To navigate from a Part Number to a Next Higher Assembly in the Parts Usage, you can click on the Part Number, column "Next higher assembly", in the current Parts Usage Report:

Parts Usage Navigation Example
Scope
The following elements are displayed:
The contextual area is updated according to the current drawing.
- The drawing number and the drawing title
- 4 options: Each option allows to switch and to access the selected document in the current Drawing Set.
- Pictures: Access to pictures
- Parts List: Access to the Parts List report
- Parts Usage: Access to the Parts Usage report
- History: Access to the Drawing Set History (available for authorized users)
- The total number of sheets composing the current Drawing Set
| Navigation through the drawing hierarchy |
Principle
Navigation is used to go from one drawing reference to another:
The "Top Down navigation" using Parts List: When you display a Parts List you can click on a Part Number. Its Parts List is then displayed.
The "Bottom Up navigation": When you display a Parts Usage, you can click on a Next Higher Assembly. Its Parts Usage is then displayed.
Top down navigation using Parts List
When a Parts List is displayed it is possible to get information concerning one of the components used in this Parts List. In the Parts List report links are printed. By clicking on the component part number you obtains the display of the Parts List of this item.
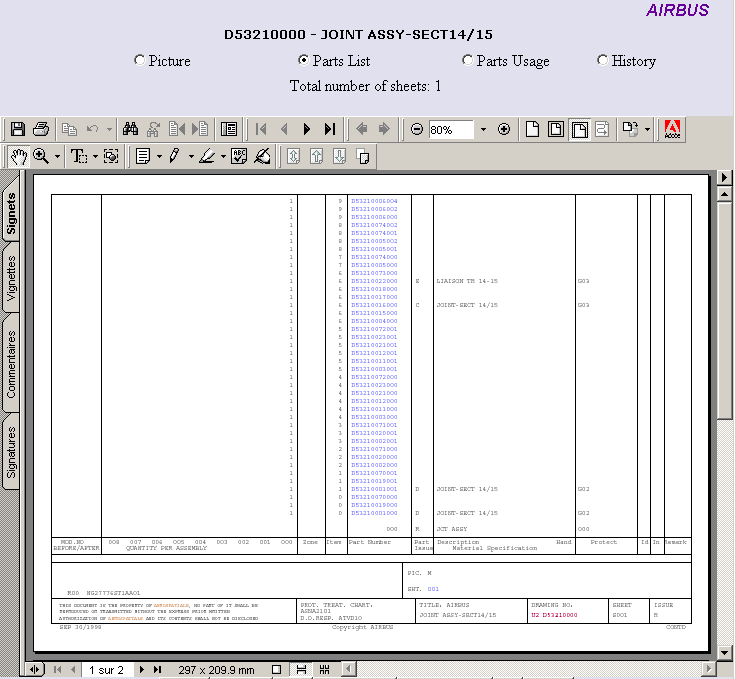
This navigation offers the possibility to go down in the drawing hierarchy and to reach detailed information (detail drawings).
In addition, you can display the text associated to a remark. When you click on such a remark link, the PDF reader displays the page where the text of this remark is printed. With the remark number it is easy to focus on the associated text .
The last kind of link printed in the Parts List is the sheet picture one. By clicking on such a link you get the graphic picture for the concerned sheet number.
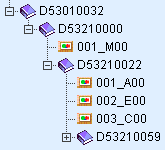
Refer to "To view Parts List" paragraph to get all more details
Bottom Up navigation using Parts Usage
The Parts Usage provides the Next Higher Assemblies with associated Customer effectivities.
If you click on a Next Higher Assembly, the Parts Usage of the associated drawing is displayed.
Refer to "To view Parts Usage" paragraph to get all more details.
| To view the results of a query |
Principle
You can perform an open search in the query area. You obtain a list of drawing numbers with their sheets composition that are displayed in the display area.
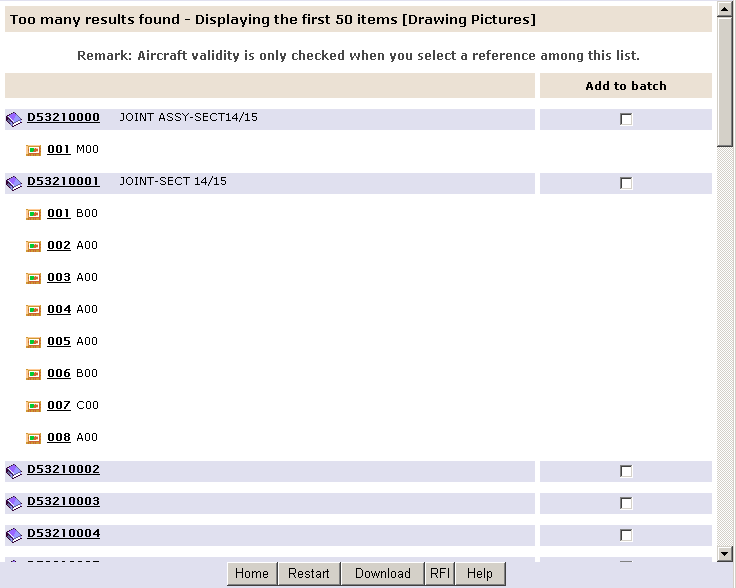
Remark: When too many results are found only the first items are displayed. A message appears at the beginning of the list (see example here after).
Scope:
The following elements are displayed:
This area is empty
If only a few drawings are found their numbers are displayed. Otherwise a message appears to inform the user that only the first items will be displayed.
Note: For each drawing that has been found, you can click on an 'Add to batch' option to include drawings in a batch list and ask the download option.
| The HISTORY option |
Principle
An "History" option allows authorized users to view the history of a drawing.

Scope:
The following elements are displayed:
The contextual area is updated according to the current drawing.
- The drawing number and the drawing title
- 4 options: Each option allows to switch and to access the selected document in the current Drawing Set.
- Pictures: Access to pictures
- Parts List: Access to the Parts List report
- Parts Usage: Access to the Parts Usage report
- History: Access to the Drawing Set History (available for authorized users)
- The total number of sheets composing the current Drawing Set
- Drawing issues and sheet issues are listed in descending order. Click on a sheet at a specific issue to display it.
| Specific Message for Drawing Sketch Issues |
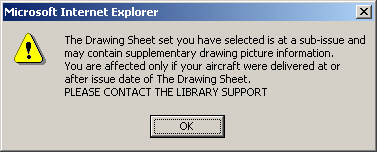
For some drawing Issues, Engineering Drawing may display a particular caution message. In that case please contact the Airbus Library Support as indicated. The Technical Library will provide you with the complementary information not yet online. A sketch issue is an issue that endes with a number from '1' to '5' (example: 'BT1').
